
From Jupyter to Pluto
We can use Julia with our trusty Jupyter and be on our way. But in this article, we’ll see why you’d want to instead use Pluto.jl. TL;DR Pluto is an Observable inspired notebook platform targeted at beginner programmers. That being said, it’s still an extremely handy way to compute in Julia.
First Steps
As expected, installation is as simple as opening julia, switching to pkg with ], and installing Pluto with add Pluto. Now you go back to ‘normal’ mode (with backspace remember ?), import Pluto and run it:
(@v1.5) pkg> add Pluto
Resolving package versions...
Updating `C:\Users\icebear\.julia\environments\v1.5\Project.toml`
[c3e4b0f8] + Pluto v0.12.7
Updating `C:\Users\icebear\.julia\environments\v1.5\Manifest.toml`
[99f44e22] + MsgPack v1.1.0
[c3e4b0f8] + Pluto v0.12.7
julia> import Pluto
[ Info: Precompiling Pluto [c3e4b0f8-55cb-11ea-2926-15256bba5781]
┌ Info:
│
│ Welcome to Pluto v0.12.17 🎈
│ Start a notebook server using:
│
│ julia> Pluto.run()
│
│ Have a look at the FAQ:
│ https://github.com/fonsp/Pluto.jl/wiki
└
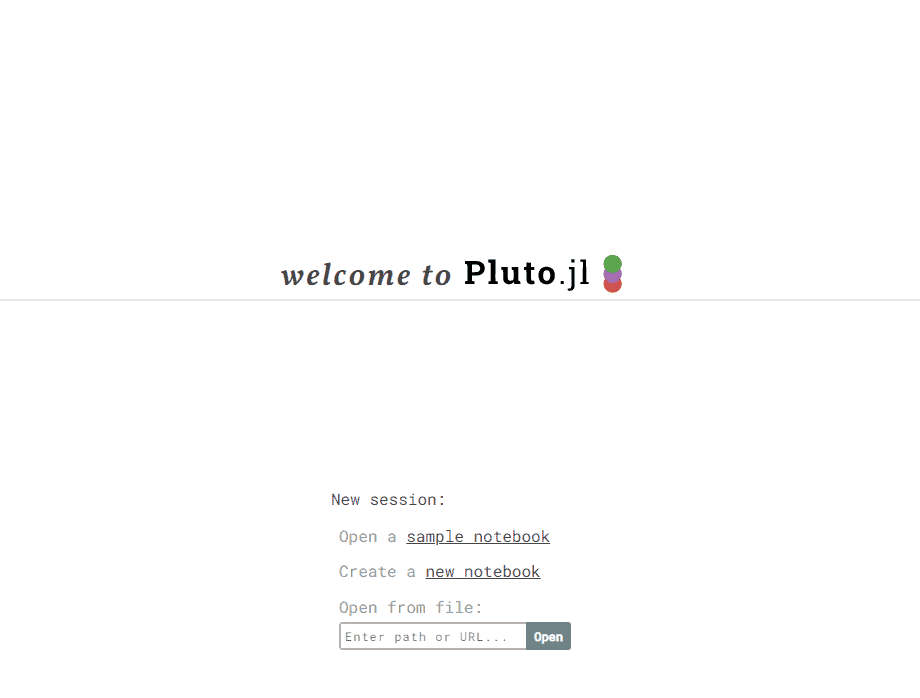
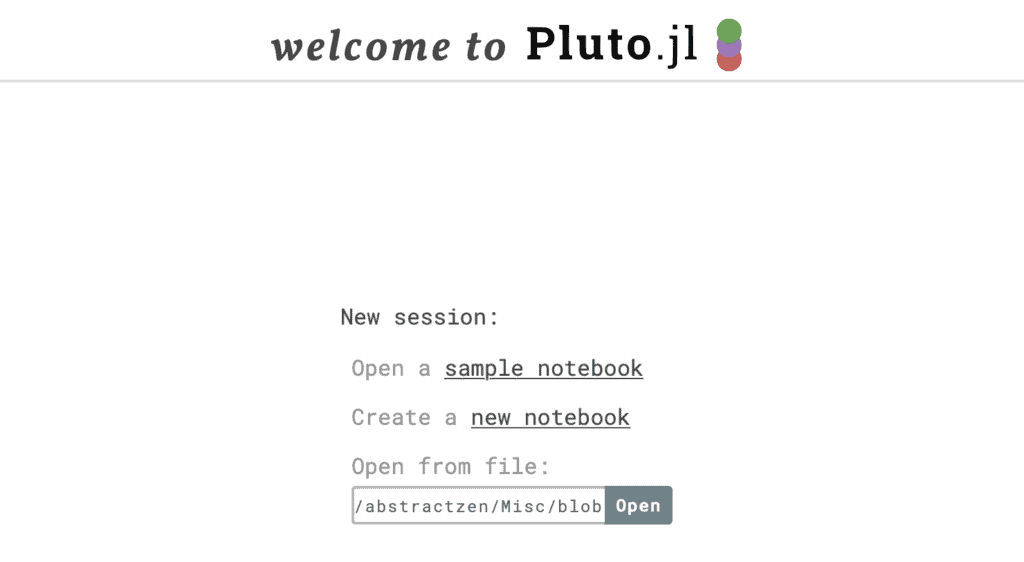
julia> Pluto.run()And you shall be greeted by the welcome screen shown above (in your browser). You should go ahead and open one of the sample notebooks they do a great job of expositing Pluto’s core functionality. Thus we now talk about the raison d’etre of that functionality.
Reactivity beckons
Reactivity refers to changes being automatically propagated through to rest of the notebook, as if it were ‘reacting’ to each diff. This way, one can experiment with their ideas without having to keep the sequence in mind. You can implement an algorithm, realize you made a mistake, and fix it to get the correct solution without having to worry about where all that mistake caused an erroneous computation. This philosophy of getting your mental representation of the computation closer to it’s internal representation in the machine is a core tenet of Julia, often hinted by touting it’s homoiconicity. Pluto further delves into this by allowing you to hide code cells and effectively free up your thinking.
Another very handy thing you might see peeking at you is the Tab for Live Docs:

You don’t even need to Alt-Tab to look up documentation! Just like the name says, it shows documentation of the line you’re currently typing, think IntelliSense, but with a dedicated floating window. Let’s look at a demonstration of all that we’ve talked about till now.
Demo
Let’s make an array:

Now lets evaluate the block by either click the play button, or using Shift+Enter:
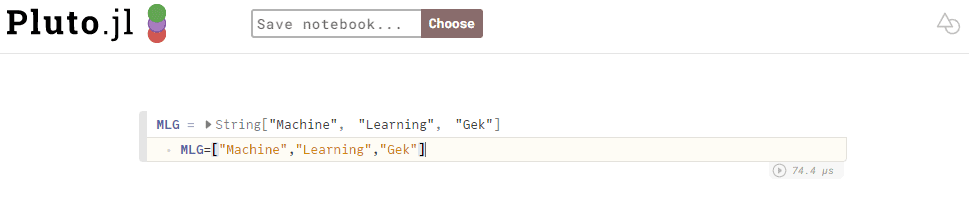
Note how Pluto detects that our notebook has just gotten something of substance and thus gives us an option of saving it. Also note how we don’t have to use any magic for Pluto to tell us the time that evaluation took, we just get it by default. But this array isn’t important, let’s hide it (click the eye icon on the left:

Now lets print MLG, click the plus button to make a new cell and:
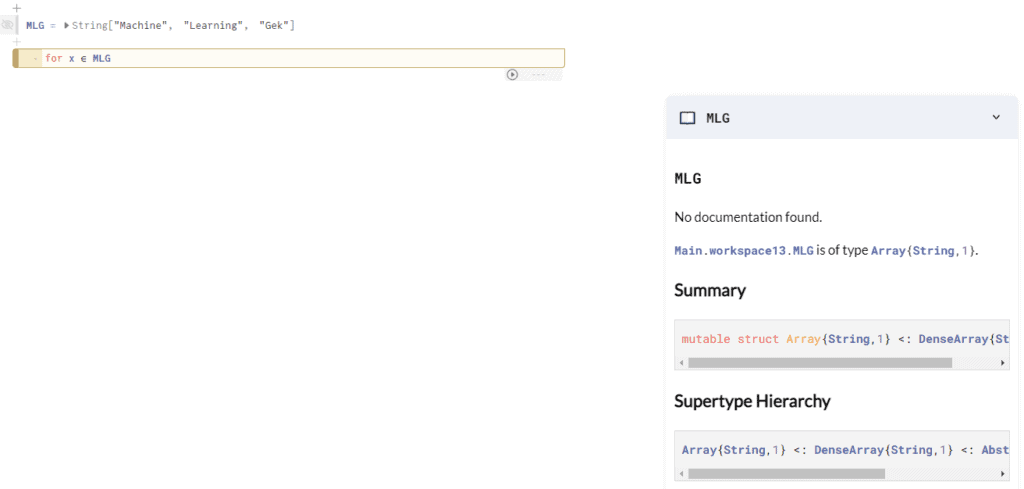
and oh! the Live docs dynamically gives us in-depth information about each function we start typing, but let’s not get distracted:
My my, its even context aware! Alas, I got distracted again.
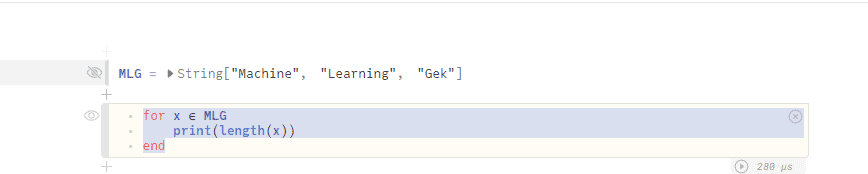
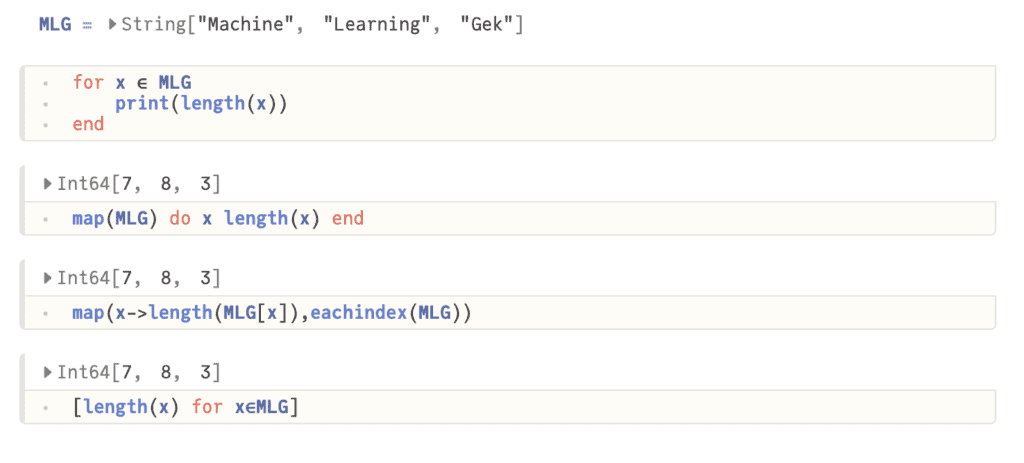
Ok, finally completed my block, but it doesn’t print anything??! Well, that’s precisely the reason behind this article. Unlike Jupyter, Pluto is not just a notebook environment for Julia, it’s a bit different (in true observable fashion ha!). But lets look at how we’d do what we want to do. The thing to remember is that Pluto displays the last returned value of any cell. Any print commands in between won’t work( as of the writing of this article).For a lengthier discussion as to why this happens, this issue is a good reference. Getting back to the implementation at hand, we can use comprehension:

Or a lambda:

Or a simpler lambda:

Lets look at. the whole program once:
Oh no, I misspelled Geek, happens to the best of us. Let’s fix it:
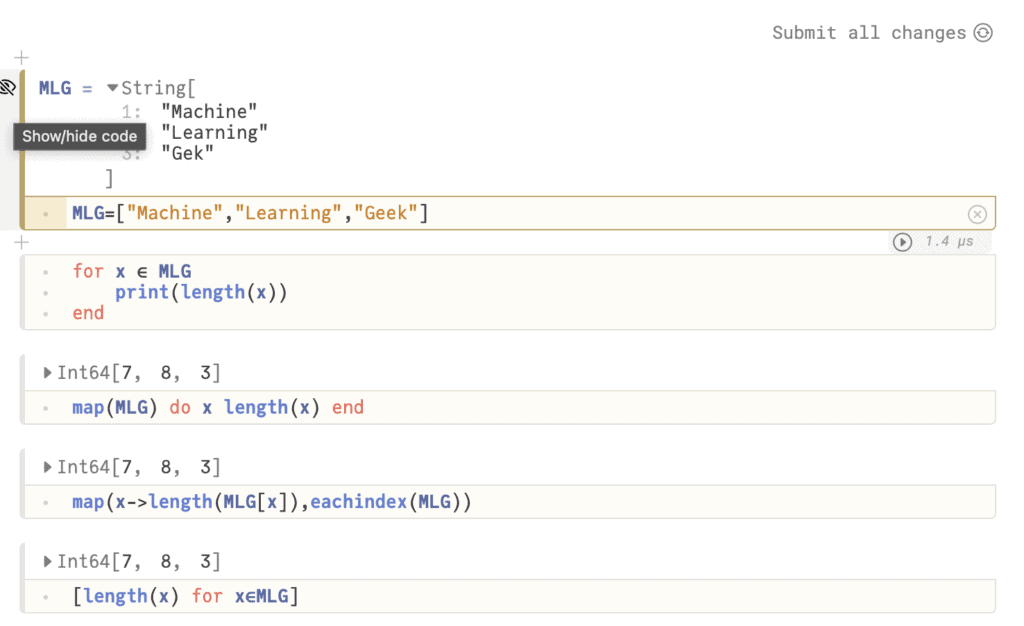
Now two things happen, for one, I can’t hide the cell anymore, this is a very useful feature, any cells that have been modified, but not executed cannot be hidden. Secondly, we see that button asking us if we want to submit all changes, this is useful when we have made multiple changes, but for now, just Shift+Enter will work as well.

And we see that the cell is hidden again. Also, though we just executed one cell, the rest three updated to reflect that “Geek” has length 4 not 3. In true Observable fashion, you get to inject HTML, or even JavaScript if you’re crafty (more on that in the article on visualisations).
Roll Credits
If you want to try this notebook for yourself, when at the welcome screen, you can simply enter the usl for this notebook https://github.com/abstractzen/Misc/blob/master/MLG/PlutoStarter.jl and click open:
Note that though useable, Pluto is still in its early stages of development. But that being said, its a great project to start contributing to, the codebase is still simple enough to be understood within the week, and there are plenty of small issues to go around.
Some noteworthy features that are lacking though are as follows. You can’t yet host the notebook server on a machine, and access it from another one. Autocomplete is still being perfected. There are issues with the lifecycle of codemirrors that affect the undo buffer. Also, being targeted at beginners, vim-keybinds are not going to be arriving anytime soon (at least on master hehe).
Now go ahead and check it out for yourself!